
Morimens Wheel of Destiny Guide: Best Wheels & +12
Use our Morimens wheel of destiny guide to choose standard wheels, understand +12 upgrades, and plan smarter pulls for your team without wasting resources.
Jump to
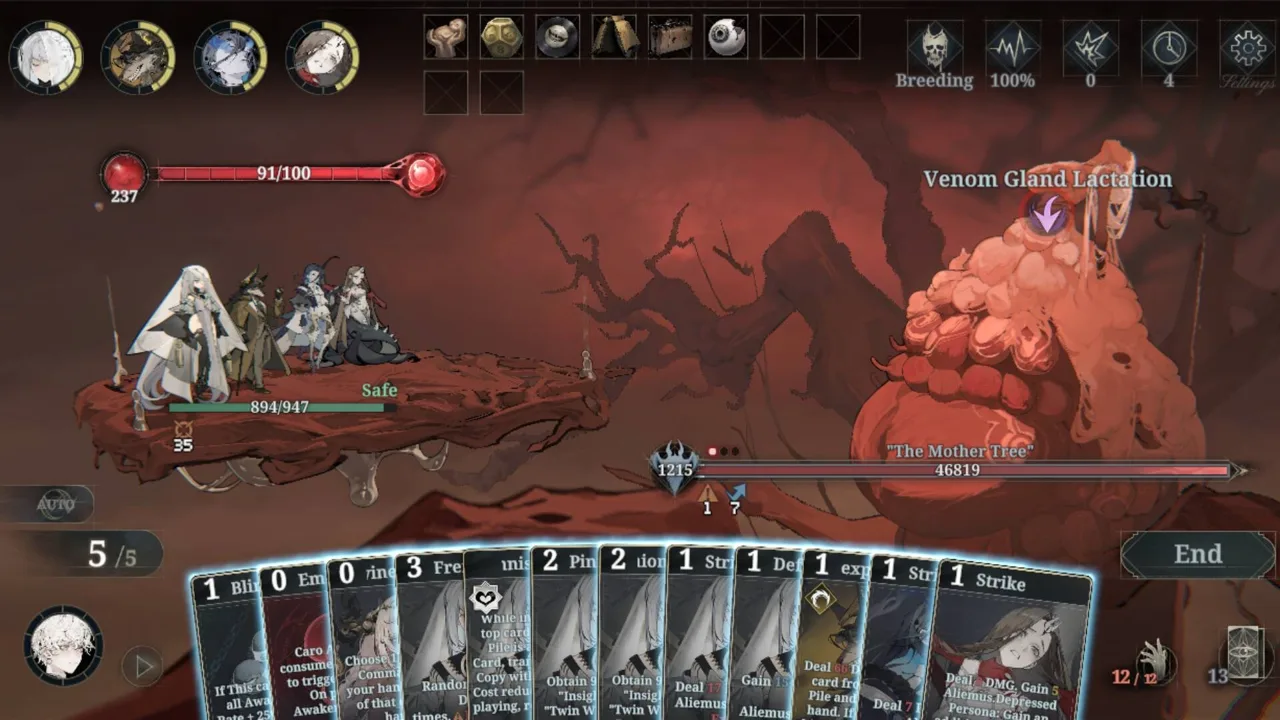
How Wheels of Destiny Work
The right wheel can give an Awakener more than extra damage: it can improve card access, reduce costs, or keep your defenses intact between turns. This Morimens wheel of destiny guide explains which effects deserve attention and why +12 ascension changes equipment choices. Start by identifying whether your team needs damage, protection, or more opportunities to play its strongest cards.
Wheels of Destiny are equipment, rather than a separate gameplay mode. Each Awakener has two wheel slots, but you normally cannot equip two SSR wheels together. Equipping a +12 SSR wheel allows another SSR wheel to occupy the other slot.
Unlike conventional weapons, wheels do not require resource-based leveling after you obtain them. Duplicates advance their ascension bonuses, with +12 representing the maximum. Reaching that point requires 16 total copies.
That creates two distinct investment goals: obtaining a useful effect immediately and completing a wheel to enable a double-SSR setup. Keep those goals separate when planning pulls.
Official page: Morimens (store.steampowered.com)
Standard Wheels Worth Building Around
Standard wheels cover several jobs, from burst damage to shield retention. Choose an effect that works with the cards you actually play.
 Image: Steam / B.I.A.V. Studio
| Wheel | Main effects | What to consider |
|---|---|---|
| Blade of the Titan | Increases critical damage after Exalt; the user's cards can receive an Arithmetica cost reduction | Combines burst damage with opportunities to play more cards |
| Path Forsaken | Critical rate main stat; dealing damage can draw one of the user's command cards and reduce its cost | Multi-hit abilities provide opportunities to trigger its effect |
| Chains Unbound | Damage amplification, increased card base damage, and a chance to generate a user card at turn end | Its additional Strike critical-rate effect depends on using an Embryo |
| Memory Spiral | Increased shield generation and shield retention between turns | Provides sustained protection; its main stat is Realm Mastery |
| Rewinding Time | Keyflare regeneration; once per turn, the user's command card can return to hand after being played | Supports repeated card use, subject to its activation chance |
Blade of the Titan: A Strong Damage Investment
Blade of the Titan is a leading standard-wheel target because it combines critical damage with cost reduction. Its critical-damage effect follows Exalt, so account for that timing when planning a burst turn.
Prioritize it for a damage dealer whose cards can capitalize on those effects. Its appeal extends beyond a single signature pairing, making it a practical candidate for a long-term +12 project.
Card Access: Path Forsaken and Rewinding Time
Path Forsaken connects damage with card draw and reduced Arithmetica costs. Use it on a damage dealer that can trigger its effect repeatedly through multi-hit attacks.
Rewinding Time serves a different purpose: it can return the command card you just played, once per turn. Equip it when another use of a particular command card matters more than a straightforward damage increase.
Both effects involve a chance to activate. Plan your necessary defense before committing resources to a sequence that depends on a successful trigger.
Protection: Memory Spiral
Memory Spiral addresses an important combat limitation: shields normally disappear between turns. Its retention effect lets a shield-focused team carry protection forward, while its shield-generation bonus improves the amount produced.
Consider it when your team already generates meaningful shields but struggles to maintain protection across turns. Its Realm Mastery main stat makes the tradeoff different from equipping a wheel with a directly offensive stat.
Should You Push a Wheel to +12?
A +12 wheel is a major equipment milestone, but a wheel does not need to reach +12 before becoming useful. Several standard options work at their starting ascension, with valuable improvements arriving earlier than maximum investment.
“Wheel jail” describes the long commitment to collecting wheel duplicates instead of continually expanding your Awakener roster. The attraction is clear: a completed SSR wheel opens a second SSR slot, combining two sets of stats and effects.
Decide between these priorities based on the problem blocking your progress:
- Expand your options when your teams lack essential effects. Add shield retention, card access, or resource support before chasing duplicates solely for completion.
- Concentrate investment when your roster already functions. Choose a wheel used by an important Awakener and work toward its double-SSR setup.
- Read the next ascension bonus before spending an upgrade item. Compare the immediate benefit with the distance remaining to +12.
Avoid spreading duplicates across several unfinished projects without a purpose. Conversely, avoid committing everything to one wheel while leaving your team without the tools needed to survive.
Content requiring multiple teams also increases the value of a varied wheel collection. A powerful setup on one Awakener does not equip the rest of your roster.
How to Evaluate Limited and Paid Wheels
A limited Awakener’s signature wheel is not automatically the strongest choice for every team using that character. Examine the activation conditions and decide how much of the effect your intended wearer can use.
 Image: Steam / B.I.A.V. Studio
Hand Size and Arithmetica
Give close attention to wheels that increase hand size or provide additional Arithmetica. More cards expand your available choices; more Arithmetica lets you spend more on those choices.
Saya’s signature wheel illustrates the value of resource generation: a single copy grants one additional Arithmetica each turn. That benefit does not require completing a +12 investment.
Distinguish these effects from conditional card generation. Drawing a particular user's card after dealing damage serves a different purpose from increasing your available resources every turn.
Broad Effects Versus Specialized Effects
Before pulling a limited wheel, examine three things:
- Who activates it? Check whether its conditions require a particular card, Exalt interaction, or Realm mechanic.
- Who benefits from it? Identify whether the effect supports several Awakeners you use or a single specialized setup.
- What does one copy provide? Separate the initial effect from bonuses that require further ascension.
Pull a specialized wheel when you intend to use the Awakener or composition that makes its conditions worthwhile. Prioritize broader effects when you want equipment you can move between different teams.
Some powerful wheels are tied to paid battle passes. For a free-to-play account, keep those outside your pulling plan and compare the standard and limited options you can obtain.
Fated Legacy and Astral Reign Change Wheel Value
Check the stage’s ruleset before copying an equipment setup. Fated Legacy and Astral Reign change the value of certain wheel effects, particularly shop utility and mechanics connected to maximum HP.
Fated Legacy: Remember the R-Rarity Options
Frenzy and Emerge provide shop-related utility in Fated Legacy. Between them, their effects include guaranteed cursed-relic availability and additional free shop rerolls.
Several cursed relics in this ruleset offer powerful benefits for relatively manageable drawbacks. Use these lower-rarity wheels when your run depends on finding strong relics through shopping.
Their effects were weakened under the newer rules, so reassess that setup before taking it into Astral Reign.
Astral Reign: Account for Keyflare and HP
Astral Reign changes Rouse access: obtaining an Awakener’s Rouse card during combat consumes Keyflare. This gives Keyflare regeneration another practical use beyond charging your protagonist ability.
Poison and counter caps also depend on maximum HP under this ruleset. Account for that interaction when comparing HP-focused equipment with a wheel that offers a more obvious damage bonus.
Read the complete effect against the rules of the stage you are entering. A wheel’s contribution can come from enabling a mechanic, retaining protection, or supplying resources long before it appears in a damage number.
Continue with
 Morimens Traphase Guide: PvP Teams, Wheels, and TipsLearn Morimens traphase PvP fundamentals, build around clear win conditions, and use Wheels, targeting, and status effects to plan stronger opening turns.
Continue exploring
Morimens Keeper Guide: Your Role, Powers, and Combat
Learn the Morimens keeper's role, how Posse and Key Flare work, and how to balance Awakener abilities and Rouse in Fated Legacy and Astral Reign battles.

Morimens Guide: Beginner Tips for Combat and Growth
Use this Morimens guide to build your first team, master card combat, choose upgrades, manage pulls, and tackle story stages with a clear progression plan.
Join the community
Find game news and player help: